
Do you want to learn how to make your own emergency candles?
From stormy weather conditions to grid failure, power outages happen. It is important to have some emergency candles readily available.
You may have oil lamps, flashlights, and/or solar lighting. But what if you can’t find them when the need arises? We don’t always get a warning that the power will go out. Making emergency candles is a prepping skill you should learn.
Below are 11 emergency candles you can either make ahead of time or in a pinch to provide light in a hurry. Some of these even may provide some heat if needed.
Just so you know: This post contains affiliate links; if you click on a link and make a purchase I might make a small commission, but it does not affect the price you pay! For more information, please see my Affiliate Disclosure.
- A Word on Wicks for your Emergency Candles
- A Word on Safety
- A Word About Wax
- Small Crisco Emergency Candle
- Large Crisco Candle (100-Hour Candle) Version 1
- Large Crisco Candle (100-Hour Candle) Version 2
- Butter Candle
- Canned Fish Candle
- Cooking Oil Candle
- Crayon Emergency Candle
- Citrus Candle
- Vaseline Candle
- Tin Can and Cardboard Candle
- Homemade Wood and Wax Emergency Candle
- Other Options You May Not Have Thought About
- Emergency Candle Resources
- FAQ's
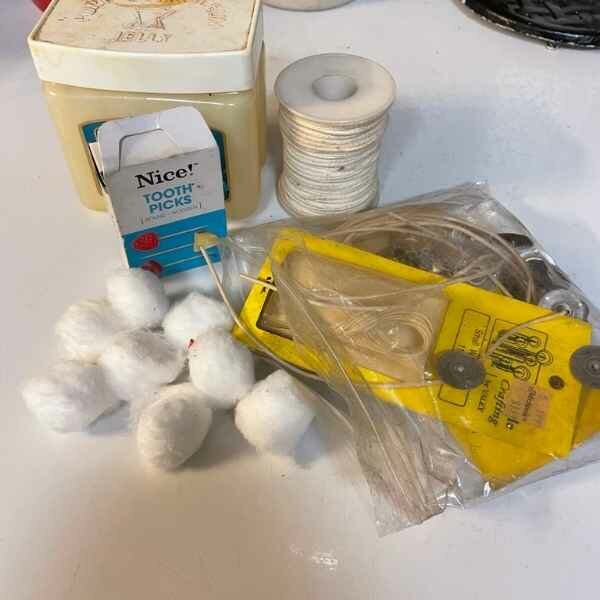
A Word on Wicks for your Emergency Candles
Wicks can obviously be bought from places like Walmart and Amazon. But what if you need them now and do not have any?
There are many ways you can construct a wick from everyday items. These items include:
- Cotton string – can be braided together to make a wick
- Cotton balls – can be shredded or pulled apart and wrapped around a small stick
- Toilet paper – can be shredded and wrapped as above
- Cloth – can be shredded and wrapped around larger sticks as a torch (outside only)
- Tampons – you can use the string as a wick or the tampon itself inserted on a stick
- Toothpicks – used as a base to wrap the above on for a small candle
By dipping your “wick” in oil or wax first, these homemade wicks can burn a long time. They are easy to construct when you need more, and they are cheap alternatives.
Making your own wick in a pinch is easy. You can keep these supplies in a waterproof box specifically for making a quick wick if the need arises.
A Word on Safety
Remember that some of these DIY emergency candles are not the same as having a glass jar candle. Please take precautions when making your own candles for this purpose.
Here are some important considerations to keep in mind:
- Never leave your emergency candle unattended. This pertains to any candle really.
- Make sure your homemade candle has a metal base or fireproof surface below it.
- Keep your emergency candles away from any flammable objects.
- Please DO NOT use gasoline for an emergency candle indoors or outdoors!
- Never leave children or pets unattended near an open candle.
- Always have a fire extinguisher nearby. Make sure it is up to date. (check with your local fire department for requirements)
A Word About Wax
Some DIY emergency candles may require you to add some form of wax to your container. Don’t panic.
You can go the route of ordering wax online if you choose to. I buy soy wax from Amazon because it burns cleaner. Usually, I keep a 5 lb. box in my cabinet at all times. I pay around 20 dollars for it.
You can also buy paraffin wax from Amazon if you prefer it. I usually keep about 1 lb of it on hand for candle making and more. It runs for about 15 dollars currently.
You can also go the completely frugal way and just use leftover candles and tart pieces. Simply melt them down in a double boiler and pour them into wicked jars. You can watch this below.
11 DIY Emergency Candles To Make
Here are 14 different types of emergency candles you can make at home from everyday objects. A few may have the same ingredients or supplies but are made differently.
Decide which candles are best for your circumstances. I have included burn times when available as well as a basic step-by-step tutorial to help you. Now let’s make some emergency candles!
Small Crisco Emergency Candle
Supplies:
- Crisco
- Glass jar with a lid
- Wick
Directions:
- Scoop some Crisco into a jar of your choice. Any size jar will work. The bigger the jar the longer it will last.
- Insert a wick into the jar as straight as you can until it reaches the bottom of the jar. (you can insert the wick first if you choose.)
- Light your wick.
Burn time: varies by the size of the jar.

Large Crisco Candle (100-Hour Candle) Version 1
Supplies:
- 1 Large can of Crisco
- Large braided or homemade wick (10″)
Directions:
- Open and remove the plastic lid on the can of Crisco.
- Insert the wick in the center.
- Light your wick.
Burn time: About 100 hours

Large Crisco Candle (100-Hour Candle) Version 2
Supplies:
- 1 Large can of Crisco
- Long taper candle
Directions:
- Open and remove the plastic on the can of Crisco.
- Insert the taper candle in the center.
- Light the candle.
Burn time: About 100 hours as above
Butter Candle
Supplies:
- Stick of butter
- Wick
Directions:
- Using the measurements on the butter wrapper, cut the stick into a 2 Tbs piece.
- Set the butter piece on a plate.
- Insert a wick into the center.
- Light the wick.
Burn time: 1 hr per Tablespoon of butter

Canned Fish Candle
Supplies:
- Any type of canned fish in oil (tuna, sardines)
- Wick
Directions:
- Open the can and remove the lid.
- Insert the wick until it absorbs oil to coat the wick.
- Light.
Burn time: Varies on the size of the can.
Cooking Oil Candle
Supplies:
- Any cooking oil. (canola, olive, vegetable)
- Mason Jar with a lid
- Drill or punch
Directions:
- Open your mason jar and remove the lid.
- Drill a small hole in the lid to accommodate the wick. (try to make it a tight fit.)
- Insert your wick into the lid.
- Fill the jar with oil, leaving a bit of space at the top.
- Put the wicked lid back on the jar.
- Light.
Burn time: This can last 2 hours and beyond based on the size of the jar.

Crayon Emergency Candle
Supplies:
- Single crayons or multiple tied together
- Non-flammable surface to put a candle on
Directions:
- Melt the bottom of the crayon or crayons with an open flame and immediately stick to a plate or other surface in an upright position.
- Light the top or tops.
Burn time: About 15 minutes per crayon.

Citrus Candle
Supplies:
Lemon, orange, or grapefruit
Directions:
- Cut the citrus in half around its circumference only cutting through the peel. Try not to damage the pith underneath.
- Remove the top half of the peel by forcing your finger under the peel to remove the “meat”. Leave the center white stem.
- This half with the pith stem is now the bottom you will use for your candle so flip it peels down into a small bowl or tin.
- Now remove everything from the opposite half and make sure it is clean all the way to the peel.
- Cut a small circle out of the center of the clean peel. Set aside.
- Fill the first half with olive oil soaking the center pith as your pour.
- Light the center “wick”
- Place the other half on top of the lid.
Burn time: This candle will burn until the center stem is gone. Can be refilled a few times usually.
Vaseline Candle
Supplies:
- Vaseline (preferably the original)
- Wick
Directions:
- If the vaseline is in a plastic container, remove the vaseline and place it in another container that is non-flammable.
- Insert a wick and light.
Burn time: Varies by the size of the container.

Tin Can and Cardboard Candle
Supplies:
- Empty can with no lid
- Cardboard
- Wax (pieces of leftover candles or other wax)
Directions:
- Cut the cardboard into long thin strips.
- Coil cut strips into the can starting from the center and working out. Fill the entire can.
- Melt wax and pour over cardboard in the can until all is coated.
- Make a wick with more cardboard. Just roll cardboard as tight as you can like a wick.
- Insert the wick in the center of the wax-covered coils.
- Light.
Burn time: Varies depending on how deep the can is. At least 2 hours.

Homemade Wood and Wax Emergency Candle
Supplies:
- Wood shavings or sawdust
- Wax
- Mason Jar
- Wick
Directions:
- Using a pot for just candle making, place wax inside to melt. (double boiler preferred)
- When the wax is melted, remove it from heat and add wood shavings or sawdust and stir.
- Pour into a metal can or glass jar. (If using a glass jar, heat the jar so it doesn’t crack first)
- Add wick. (Wick can be held in place by wrapping the wick around a skewer on top of the jar.)
- Light
Burn time: Varies
Other Options You May Not Have Thought About
Some items you may have not considered burning safely include chapstick or lip balm, shoe polish, and even cheese wax. These items burn slowly and can be used in a pinch! Get creative!
Cotton balls that have been saturated with vaseline and threaded on a wooden skewer will burn long enough to get you through the house or as light while you use the bathroom. Stick the skewer into a ball of clay and voila, an upright torch.
Emergency Candle Resources
If you do not wish to make your own emergency candles, there are many places to order them. Here is a short list from Amazon’s Supplies to get you started:
- Amazon 36-hour survival candle
- Sterno Emergency Candles
- 9-hour Candles
Other places to purchase ready-made emergency candles include the Dollar Store, Walmart, Home Depot, Lowes, and Camping and Outdoor Stores.
FAQ’s
- What is the best wax to use for emergency candles? I prefer to use leftover candle pieces to make emergency candles. However, if you wish to buy wax, I recommend soy wax because it is cleaner and healthier when burning.
- How do I dispose of candles in glass jars? You don’t need to. Just run hot water over the bottom of the jar and the old candle remains should soften enough to slide out. Then wash your jar and save that old wax for making emergency candles!
- Can a candle in a glass jar start a fire? Although I have never had a problem with the actual candle in a glass jar starting a fire, putting it close to curtains or a form of fabric could ignite it. I recommend allowing some room around all sides and the top of any candle as a precaution.
- What if I can’t have an open flame in my home? Many elderly people cannot have open flames and many parents would rather not. In this case, I would buy a few solar lights from the dollar store. Keep them charged by being outside and bring them in when needed. Another alternative is to buy the small solar powered lights that allow the light to be inside while the solar part stays outside. Battery operated lamps like the one’s used at Christmas time are an option too.
- Is it recommended to buy wicks or make your own? If you do not have wicks on hand, making your own is the only option. I would recommend at least purchasing some braided wick on a roll so you can snip off a piece at whatever size you need.

can’t wait to make mine for my family and I.
Let me know how they turn out!